Three ways to get answers:
- Browse the questions below. To search this page for keywords, hit "Ctrl + F" (Windows) or "Cmd + F" (Mac). (Help with this)
- Check CCL Community's Getting Help page.
- Can't find the answer? Ask a question in the "Ask Us Anything" forums.
General FAQs
Site Functions
- Where can I find help?
- How do I navigate my dashboard?
- How do I get help with searching?
- How do I search?
- How do I print a page on CCL Community?
- How do I bookmark a page?
- How do I find out about CCL Community events?
- What is the Action Tracker and how do I use it?
- Can I view CCL Community in other languages?
- How do I update my profile?
- How do I upload/change my profile photo?
- How do I add a cover photo to my profile page?
- How do I edit "About Me?"
- What are badges? How do I get them?
- How do I view "My Messages," "My Friends," and "My Files?"
- How do I add a file, photo or video to "My Files?"
- How do I delete a file, photo, or video I’ve uploaded?
- How do I update my contact information (from moving, etc.)?
- Can other members see my contact information (phone numbers, mailing or email addresses)?
- Can I change my name on CCL Community?
- How do I change my privacy settings?
- How do I change my CCL Community password?
- How do I update my email address?
- How do I manage email notifications for CCL Community actions, events, or subscriptions?
- How do I change my CCL chapter membership?
- How do I setup and use a site signature?
- How do I send and receive messages?
- How do I attach a file to a message or post?
- How do I add photos to a message?
- What is the best way to paste text into a message or forum post?
- How do I make sure I'm receiving emails (messages) sent from CCL Community?
- How do I make sure CCL's newsletter is in my inbox?
- What is the CCL Community Bulletin?
- How do I "@mention" another user to notify them about something?
- Where can I find out about trainings, resources, and tools?
- Where can I find a catalogue of CCL trainings?
- Can I track or log the trainings I’ve completed?
- Where can I find CCL brochures, banners, and other resources?
- What are CCL tools and where can I find them?
- What are forums?
- What are forum topics, categories, and replies?
- How do I post a topic in a Sitewide Forum?
- How do I post a topic in a group forum?
- How do I reply to a forum topic or to another reply?
- How do I add photos to a forum post or reply?
- What does it mean to "like" a topic?
- How do I search the Sitewide Forums?
- How do I manage Sitewide Forum subscriptions and notifications?
- How do I update my forum email settings?
- Can I reply to forum posts directly from my email?
- What's the difference between an Action Team, CCL Chapter Team, and Custom Group?
- How do I join and leave Action Teams?
- How do I leave a group that I'm a member of?
- How do I manage group subscriptions and notifications?
- How do I upload documents or photos to groups that I'm a member of?
- How do I upload videos to groups that I'm a member of?
- What are CCL Chapter Teams?
- Who can view a CCL Chapter Roster?
General FAQs
Where You Can Find Help
- Look here in the CCL Community FAQs
- Submit a support request at cclusa.org/help
- Pose questions in the Ask Us Anything Forum
- Take a Tour to explore CCL Community
Getting Help With Search
Email brett@citizensclimate.org and we’ll do our best to help you complete your search.
Searching CCL Community

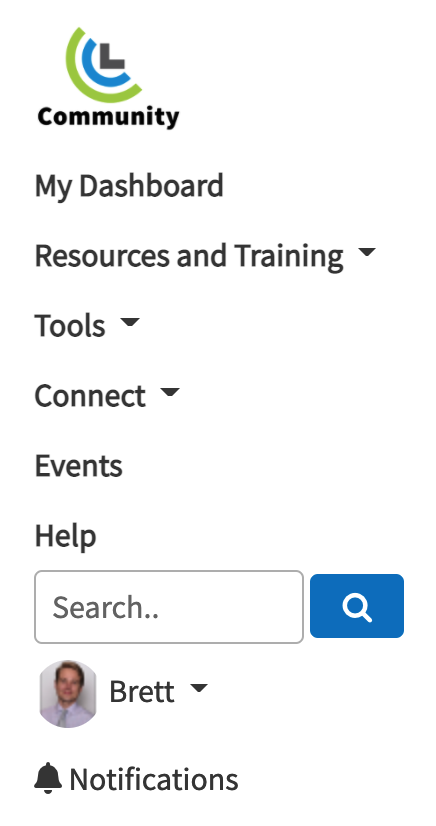
To start a search, type words or phrases into the search bar on the right side of the top menu (highlighted in green above). You will see auto-complete suggestions in a drop-down after several letters are typed. The auto-complete suggestions are based on other commonly searched words. If desired, select any of the suggested keywords, or add your own search terms or phrases. Then click the blue search icon, or press your return key.
You will then see results on the Search page. You can also go directly to the Search page without entering text by clicking on the search icon (magnifying glass).
Search displays the most important and relevant results at the top. Search results include content from resources, training, groups, tools, forms, and bulletins.
On the left side of the search page, you can filter the results by the content category, such as resources or discussions. You can also sort the results by relevance or date. As you make selections, the search results automatically update. To see a demonstration of the search filters, view this short video (3:45).
However, the main search page doesn’t search through CCL Community member names. If you're looking for a member, search the Member Directory.
If you search using a keyword to find something and it doesn’t turn up in the results, try narrowing down the keywords to only the one or two most important words (i.e. using "cosponsors" instead of "H.R. 763 cosponsors list") as the algorithm performs better if there are fewer keywords to match. If this still doesn't do the trick, please submit a support request at cclusa.org/help so we can address and improve the search algorithm for all CCL Community users.
While the site search does includes content posted by groups, if you want to narrow your search to a local CCL chapter or other group, go to that group's home page, then select the “Search” link on the left side of the group menu. This will search the content files, members, and forum discussions from that specific group.
Printing a Page on CCL Community
- Select File > Print in your browser.
- Or use a keyboard shortcut. Windows & Linux: "Ctrl P." Mac: "⌘ P."
- Chrome: right click and select "Print." Safari: right click and select "Print Page."
Bookmarking
Watch how to bookmark your favorite page(s) with this short training video (1:24 min)
To add a bookmark, look for the bookmark icon (see below):
On pages where the bookmark is available it is either at the top of the page content or towards the bottom. If you don’t see it, find it by searching the page (Ctrl+F or Cmd+F) for “bookmark.”
Click on the bookmark icon, and a notification that your bookmarks have been updated will appear.
The new bookmark will then appear in the "My Bookmarks" block at the top of the left sidebar of your Dashboard.
Note: Pages that are not bookmarkable don't have a number in the URL. These pages cannot be bookmarked due to current limitations of the platform.
You can remove bookmarks by selecting "Remove bookmark" in the “My Bookmarks” block on your Dashboard.
Note: No one will know or be notified if you bookmark their event, forum post or profile.
Finding and Signing Up for CCL Community Events
To access the national event calendar, click on the “Events” link on the top menu bar of any page. This will open the Events page. Featured events are displayed as well as a monthly calendar. On the right side of the page you can filter events displayed at top of page by event type.
Local, regional and national events are also displayed on your Dashboard in the “Upcoming Events” block on the left side of the page. Any events that you have signed up for are displayed in the “My Events” block.
CCL chapter and Action Team events can also be accessed using the “Events” link on the group home page.
To RSVP for an event, or to find out more about it, click the event name on the Events page in the top area or in the calendar. Or, click the event name in the “Upcoming Events” block in the Dashboard. On the event page, you can sign up for the event, or indicate you are a “maybe” or that you are not planning to attend.
The benefits of RSVPing for an event are:
- The event will be displayed in the “My Events” block on your Dashboard.
- It lets both the event organizer and other members know you plan on attending
- The event organizer will be able to communicate directly with you about the event and provide updates and reminders.
You can also click on a link to add the event to a personal calendar (different calendar types are displayed in a dropdown). There is also a block to share the event on one of your social media accounts, if desired.
Using the Action Tracker
Before logging your first action, review the Using the Action Tracker training page, which covers the objectives, details, and instructions about how to use the Action Tracker.
By logging and tracking member actions over time, the Action Tracker provides data that can be conveyed to Congress, the media, and foundations to demonstrate CCL’s effectiveness. Also, it enables CCL chapters to assess their progress and plan future actions.
View CCL Community in Other Languages

Choose from over 100 languages to instantly translate the site into your desired language. Change back to English or to any other language at any time.
Note: Translation is provided by Google Translate.
Update Your Profile
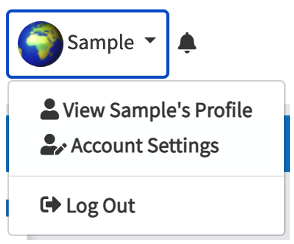 Here you will see boxes where you can update phone number and email (kept private), "About Me," and "My Interests." Just click on any of the “[edit]” links. Or, scroll down to "CCL Info" box on left side and click “[edit]” link. Here, you can conveniently edit all your profile details in one screen, with tabs for each item. Street address, if you choose to provide one, is only available to add or update through the CCL info box edit link.
 Note: Moving from one tab to another doesn’t save your updates. You must click "Save" at the bottom of each section before leaving that tab.
However, to change your name and password, go to Account Settings. Click the button with your name on the top right side of any page and select “Account Settings.” to get there. Also go to Account Settings to revise your e-mail address and site signature.
The “My Interests” tab is where you can tell us what you’re interested in doing within CCL. By sharing interests, we can recommend content and connect you with others who are also interested in your area(s). Your group leaders will also be able to recommend specific actions tailored to your interests.
To change your CCL chapter or congressional district, follow the link in the "CCL Info" tab.
To add or change your profile photo, see the FAQ below.
Regarding privacy: Only logged-in CCL members can view your profile. Your contact information including your mailing address, email address and phone numbers are never displayed on your profile. The general public and logged out users can not view user profiles. Logged in CCL members can view your profile but not any personally identifiable information other than your name, city, and state, by default. You can change the default privacy options at any time. Your contact information is only shared with local and regional leaders so that they can contact you.
Upload/Change Your Profile Photo
On the upper right left side of your Member Profile page, select the camera icon. A list of actions will be displayed. Choose “Add Profile Photo.”
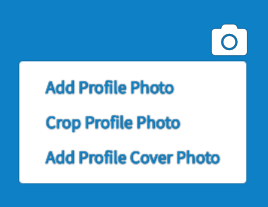
Then in the resulting dialogue box, browse to the desired photo on your computer or device, select it, and click “open.” Next, the photo will be displayed in a box. You can drag the image to adjust the cropping. Select “Save” to make it your profile photo.
For best results, crop a copy of the photo on your computer or device to the portion of the image you want and in a square format.
The acceptable file types are JPG, PNG, TIFF, GIF, or BMP and the maximum size allowed is 20 MB.
If you want to change your profile photo, follow the directions above for adding a photo. Browse to the new photo, select, crop and save, and the old photo will be replaced.
If you want to re-crop your profile photo, click on the camera icon and select “Crop Profile Photo.”
Adding a Cover Photo to Your Profile Page
.
Then click the camera icon in the top right corner of the large blue area and then choose “Add Profile Cover Photo” from the menu.

Browse to the desired image file on your computer or device, and click “open.” The image will appear in a box showing how it will look when cropped to fit in the blue area. Drag the image to desired cropping and click ‘Save.”
Note: The format of the cover photo area is a long horizontal, so select an image that can be successfully cropped to fit.
Update "About Me" Information
CCL Community’s Accomplishment Badges Program
As you complete actions such as contacting Congress, tabling, or attending CCL chapter meetings and enter them in the Action Tracker, badges will appear in your profile page below your name.
For your first action in a category, you are awarded a green badge. Then as you complete more actions in that category, you are awarded a bronze, silver, and ultimately gold, depending on the number of actions.

If you have already earned badges, hover over any of them to see how many actions are needed to earn the next level. Also, look at any friend or fellow group member's profile page to see what accomplishment badges they've earned.
For a list of actions that earn accomplishment badges, see the the list in the badge glossary page.
In addition to accomplishment badges, role-based badges may appear next to members’ names to indicate roles they play in CCL Community, such as Group Leader (GL) or Congressional Liaison (L). See the badge glossary page for a list.
To get credit for your actions to build political will for climate action, make sure to log each of them in CCL's Action Tracker (the data will sync overnight).
Viewing My Messages, My Friends, and My Files
To view your CCL Community friends, click on "Connect" on the top menu of any page and select "My Friends" on the right side of the dropdown.

To view files that you’ve uploaded to a group, action team, or to your personal files folder, click the button with your name on the top right of any page and select "View [your name] Profile.. This will open your profile page. On the lower left side, you’ll see the “My Files” block. Click on “Manage My Files.” Or just click on this link.
Adding a File, Photo, or Video to My Files
You will then see the My Files page where you can upload many types of files, including PDF, word processing, or spreadsheet documents. Click the link “Add File” in the blue bar or right side to display a box where you can browse to files to upload.
If you wish to upload a photo or a video, click on the “My Photos” or “My Videos” link in block on right side of page.
On the My Photos page, select the blue button “+Photo” and follow instructions to select and upload the desired image.
On the My Videos page select the blue button “+Video” and follow instructions to "embed" a video. For detailed instructions on embedding videos, see this FAQ. The FAQ is for group pages but the same instructions apply to My Videos.
For photos and videos, you have the option to select “share sitewide” when uploading. This means that those files becomes public and any member can view them. It is necessary to do this if you want to share a photo or video with another CCL member, for example.
Deleting Files, Photos, or Videos Uploaded to CCL Community
Deleting Files
Click on the link to go to the My Files page. Files that you have uploaded to your profile page, your chapter, or other groups will appear in bars with the file name and type, such as .pdf or .docx.
To delete a file, click on the bar for the file you wish to delete. Then click on the "..." link in the upper right to display a pop-up menu. Select the delete option. Click “OK” to confirm.
Deleting Photos
First, follow instructions above to go to the My Files page. Then, on the right side and bottom of instructions, select the “My Photos” link. You will see thumbnails of all the photos you have uploaded to CCL Community.
To delete a photo, click on the thumbnail of the photo you wish to delete. Then at the bottom of the popup window click on the blue “Delete” button. Click “OK” to confirm.
Deleting Videos
First, follow instructions above to go to the My Files page. Then, on the right side and bottom of instructions, select the “My Videos” link. You will see thumbnails of all the videos you have linked to CCL Community.
To delete a video, click on the thumbnail of the video you wish to delete. Then at the bottom of the popup window click on the blue “Delete” button. Click “OK” to confirm.
Note: video files are not hosted on CCL Community. They are linked from streaming services and embedded.
Updating Your Contact Information
1. Click the button with your name on the top right of any page and select "View [your name] Profile. This will take you to the Member Profile page.

2. Click on any of the "[edit]" links to open an editing view with multiple tabs.
3. Select any of these tabs to update your contact information: "Address," "Phone Number," or "Email." For email, you will be directed to update that in Account Settings. You can update your phone number and address in the edit view.
Any changes made to your mailing address, phone number or email will be saved to CCL’s database.
After making changes, be sure to scroll down to the bottom of the page and click “Save” before exiting the tab.
Please always use the Member Profile page to update contact information. Do not email CCL requesting changes. Your mailing address, phone numbers, and email will never be displayed publicly or to another CCL Community member.
Privacy - Contact Information
Changing Your Name on CCL Community
To do this, click the button with your name on the top right side of any page and select “Account Settings.” Select the “Settings” tab (it should default to that). Make desired changes in the “First Name” and/or “Last Name” text fields.
Be sure to scroll to the bottom of the page and click the blue “Save Changes” button.
Update Your Privacy Settings
To access your privacy settings click the button with your name on the top right side of any page and select “Account Settings.” Once there, select the "Privacy" tab to change what information is private, visible to friends only, or visible to everybody in CCL Community.Note: Personal information such as your email address, mailing address and phone numbers are never displayed on your profile. However, you can control which users see other parts of your profile.
On the "Privacy" tab of the Account Settings page, select whether “Everybody,” “Friends only,” or “Nobody” can perform an action or view content for the categories listed (default setting is “Everybody”). After making any changes, make sure to scroll down to the bottom of the page and click “Save” before exiting this screen. Otherwise, your updates will not be saved.
Changing Your CCL Community Password
Scroll down to the “Change Password” text fields. You will need to enter your current password as well as your new password (twice). Be sure to make a note of your new password for future logins.
Then, scroll to the bottom of the page and click the blue “Save Changes” button.
Note: Your password must have a minimum of 6 characters, at least 1 uppercase letter, and at least one number or special character.
If you don’t remember your current password, click the "Forgot password?" link from the login page and have a new password sent to your email address.
Change Your CCL Email Address
Then scroll down to the "Email Address" section, enter your new email address twice, and then scroll to the bottom and click the blue "Save changes" button to confirm.
Note: Since CCL Community is integrated with the CCL database, updating your name and/or email address on the Account Settings page means your name and email address will change everywhere within CCL’s database (your CCL Chapter Roster, Action Team Rosters (if you have joined any Action Teams), CCL emails, conference registrations, etc.).
Managing Email Notifications from CCL Community
While all notifications about the CCL Community events and actions are sent to your CCL Community Inbox, some of these notifications are also forwarded by default to your email address registered with CCL. Members can easily control what they are notified about and in many cases how frequently they are notified.
To view and manage all your email notifications and subscriptions, click on “Account Settings” in the dropdown menu below your name at top right of any page.

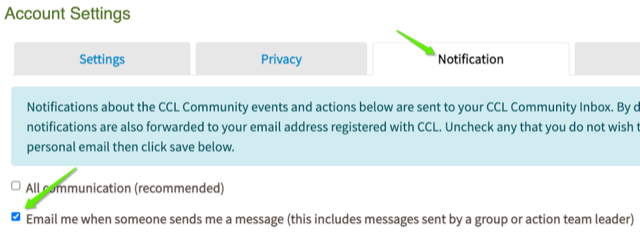
Select the “Notifications” tab to see a list of actions and events that you are being notified about. Many of these notifications were enabled by default when you joined CCL Community. Uncheck those that you do not wish to be notified about in your personal email. You can also select “All Communication” to receive all notifications or “Unsubscribe from Community notifications” to receive none.
For all checked actions or events you will be notified instantly. Unlike forum subscriptions, there isn’t a digest option for notifications. When finished, be sure to click the blue “Save” button on bottom right.
Select the “Subscriptions” to see a list of Sitewide Forums. Here you can see if you have subscribed to receive email notifications about new postings and replies to any of the forums. Check or uncheck any to manage your subscriptions. With forums, you can select the frequency of notifications.
Also under the “Subscriptions” tab is a list of all the groups you are a member of, such as your CCL chapter. Select any link to go to the group forums settings page. Here, you can manage the forum subscriptions for that specific group.
For more details and instructions about managing notifications and subscriptions, consult these FAQs:
Make sure CCL newsletter is in your inbox
Staying Updated with Community Bulletin
Manage Sitewide Forum Subscription & Notifications
Update Forum email settings
Managing Group Subscription and Notification Preferences
How to Make Sure You Receive Emails From Your Group Leader
Change Your CCL Chapter Membership
Note: members in state At Large Groups can switch to a local CCL chapter using this method, if desired.
Using this form will move you to another CCL chapter and add you to the new CCL Chapter's Roster. You will also be added to the new CCL chapter's group on CCL Community during the nightly data sync (i.e., it won’t happen instantly).
Note: You can be a member of only one CCL chapter, but you can, however, join as many Action Teams as you wish.
Sometimes, a CCL chapter may span several electoral districts. Be sure to check that the electoral district listed for you is correct, using your address, and update if necessary.
How To Create and Use A Site Signature
Scroll down to the bottom of the "Settings" tab to the Site Signature block and enter text for your desired signature. Click the blue "Save changes" button (see below). The site signature input box accepts carriage returns and/or <br> tags for line breaks and you can use <a href> to embed a link. (Follow links for <br> and <a href> for instructions.)
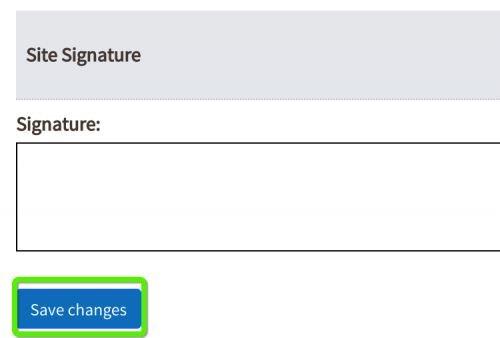
Note: The site signature will display within private messages and forum posts, but does not currently work for emails sent via CCL Community's group email interface.
Sending and Receiving Messages With CCL Community Members
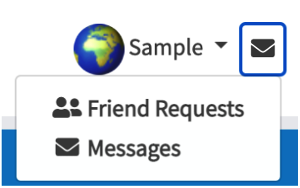
To send a message select the “Compose" tab. Fill in the subject and the message text. Use the editing toolbar to format text, add links, or add images. Click paper clip icon at bottom to add document attachments.
Select the green “Click to select recipients” button to search for and select your message’s recipients. Friends will be shown by default, but you can type names into the recipients text field to search for other CCL Community members.
Your message will be sent to the member’s email address associated with the CCL account, unless they have message notifications turned off in their email. It will also appear in their My Messages page
In the My Messages screen, select “Inbox” on left side to see messages you have received (default view). Click on any message to reply. Select “Sent” to view messages you have sent.
Note: The message feature is an internal communication system for CCL Community members, but most members choose to receive message notifications in the personal email platform they provided when joining CCL. This is the default setup when members join. However, to send a message to another member’s My Messages page, you must compose and send it from your My Messages page.
How to Attach a File to Your Post/Message

Once you've clicked the icon, select a file to upload by clicking on the "Choose File" button, or select a file you've already uploaded.
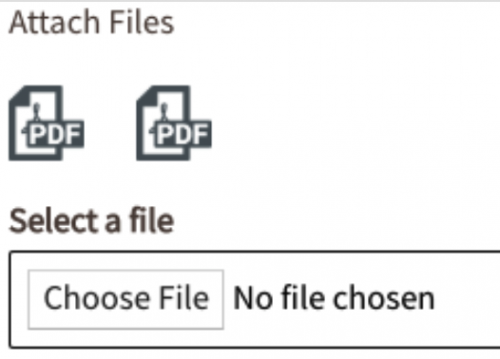
If uploading, type in a title name for the file (required) and then click "Post" on the bottom to upload. Your file(s) will then appear at the bottom of the body of your text field with the provided name and the ability to click the "x" to un-attach it.

Finally, finish composing the rest of your post or message and click "Post" or "Send Message" to share.
Adding Photos to Messages
When composing the message, first add text. Place the cursor where you want the photo to appear. Then click on the image icon in the editing toolbar (see below).

This will bring up a dialog box that displays all photos that you have previously uploaded to CCLCommunity, as well as a box to browse to other photos on your computer. Select a photo from your photo gallery or select “choose file” to upload a new photo, which can be any of these file types: BMP, GIF, JPEG, JPG, or PNG. If you are uploading a new photo, add a name (required). Then click “Post” at the bottom of the dialog box. This will add the photo to your gallery and also to your message.
The photo will appear in the message text where you have positioned it. Depending on the size of the original photo, you may want to resize it. Right-click on the image to see a pop-up menu. Select “image properties.”
In the “Image Info” default tab you can set the width and height of the photo, as well as add a border or specify horizontal or vertical space around the image. Just enter numbers - they represent pixel dimensions. The preview pane will display the image with text to give you an idea of what it will look like and help size the image. You can also choose left side or right side alignment.
In the “Link” tab you can enter a URL if you want to image to link to a web page or an item in CCL Community.
For instructions on adding photos to forum posts or replies, see this FAQ.
The Best Way to Past Text Into a Message or Forum Post
You can avoid this with a few simple tricks. Instead of the normal paste commands, use these techniques.
For PCs
Whether you are using Chrome or the Microsoft Edge browser to view CCL Community, copy the text you wish to paste from the source, click inside the body text area of the forum post or message, and press "CTRL - Shift - V" on your keyboard.
Or, paste the source text into the plain text Notepad app. This will strip formatting. Then copy that text from Notepad and use the basic "CTRL-V" keyboard shortcut to paste into the forum post or message. This method will work no matter what combination of source and browser you are using.
For Macs
If you are viewing CCL Community in Chrome or Safari, you will find a command in the Edit dropdown menu: “Paste and Match Style.” After copying your source text, click in the body text area of the forum post or message, and select “Paste and Match Style” in the browser edit menu. This will strip source formatting. The Firefox browser does not have the “Paste and Match Style” edit command, so use the Mac keyboard shortcut “Shift - Option - Command - V” to strip source formatting.
You can also use the keyboard shortcut from Chrome or Safari, if convenient.
Another way to strip source text formatting is to paste the source text into the Mac Notes app. Then copy it from Notes and paste into your forum post or message using the browser edit menu “Paste” command or keyboard “Command - V.”
Tip: Using the Notes app has the advantage of preserving hyperlinks, bold formatting and bulleted lists from your source text.
Make Sure You're Set up to Receive Emails (Messages) From CCL Community
Taking these steps will help you stay connected with CCL and help us reach other volunteers inboxes as well (part of some spam filters are based on feedback from other users that such messages are considered “not spam.”)
If you use Gmail and have the promotions tab, move one of our emails from the promotions tab to your primary tab to make sure you don’t miss them.
Instructions for primary tab move For Gmail Users
- Open Gmail in your browser.
- Click on your promotions tab
- Find CCL’s Newsletter or Weekly Briefing.
- Click and drag the message into your primary tab.
- When asked “Do this for future messages from newsletter@citizensclimate.org?” click Yes.
If this is occurring for you after trying out the suggestions above please submit a support request at cclusa.org/help so that we can determine what the problem is.
Making Sure the CCL Newsletter Is in Your InBox
To make sure our emails land in your inbox please add newsletter@citizensclimate.org to your contacts.
Also check your spam or junk folder to make sure our messages are not routed there. If you find one, mark it as “not spam” or “not junk” to move it to your inbox.
Staying Updated With CCL Community Bulletin
Find the bulletin by scrolling down on your Dashboard and clicking on the CCL Community Bulletin link (you can also find it by clicking on the “Community Bulletin” link in the green footer of any page in Community).
The CCL Community Bulletin provides CCL members three important features:
- Quick updates about new items and other CCL related activity.
- Archive of CCL’s Weekly Briefing and Monthly Newsletter updates and actions.
- Every other month, CCL Community releases software updates to improve users’ experiences, including new features and resolution of any issues (click here for an example).
Publishing the software release notes in one location helps CCL group leaders and CCL Community users stay updated and track platform improvements and fixes. To subscribe to the bulletin, click on the green “Subscribe” button in the upper right box and select your level of frequency (instant, daily, or weekly). You will then receive an email with the bulletin updates at that level of frequency selected automatically (more on subscriptions here).
You can also search Bulletin archives by category, author, or month posted to find specific content you’re looking for.
Using the "@Mention"
Type the name exactly as displayed (i.e. no underscores, etc.). For example: @Testy Testerson.
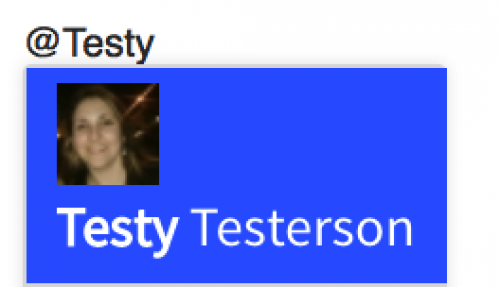
Any CCL Community user mentioned this way will receive a notification that they've been @ mentioned (some call this “being tagged”) if they have the checkbox marked for "Email me when someone @ mentions me" in their Account Settings (click the button with your name on the top right side of any page and select “Account Settings.” to access).
Exploring Trainings, Resources, and Tools

New Volunteers. If you are a new member, the New Volunteer page describes the most important training resources to get you up to speed as a CCL member, including how to register for an information session and Climate Advocate Training, how to connect with your CCL chapter, and links to information about our focus, methods, and values. The CCL Community FAQs provides answers to questions about the site, guidelines, and step-by-step instructions. CCL Community Tours explores CCL Community’s features with a guided tour.
Trainings. To access the Training Topics page click on the “All Training Topics” link in the the dropdown menu shown above. At the top you will see featured, recent, and upcoming training topics, and then below that other topics organized by category.
Resources. The CCL Resources page is where you can find access to materials such as handouts, images, and reports to print or share digitally. Examples include brochures, banners, constituent letters, business cards, and the CCL style guide. Select the link “All Resources” in the dropdown menu to go there.
Tools. CCL has developed a number of tools to help members record activities, report results, track relationships, engage with members of congress or potential supporters, research CCL statistics, and view and manage group members.
To view the CCL Community Tools page, select the top menu "Tools" link and then select the link “All Tools” in the dropdown menu.
Exploring CCL Training Topics

At the top of the Training Topics page you will see featured, recent, and upcoming training topics, and then below that other topics organized by category.
The broad categories of topics include “Lobbying Congress,” “Media Relations,” “Grassroots Outreach,” and several others. Click on a topic category to see a group of related topics. In the case of “Grassroots Outreach,” this includes topics such as “Tabling and Clipboarding” and “Presentations.”
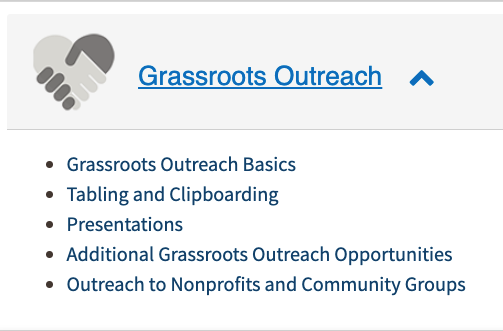
Select an individual topic to see all of the trainings available under that topic, as well key resources and links. So, for example, under the topic “Tabling and Clipboarding” is a training on “How To Table An Event.”
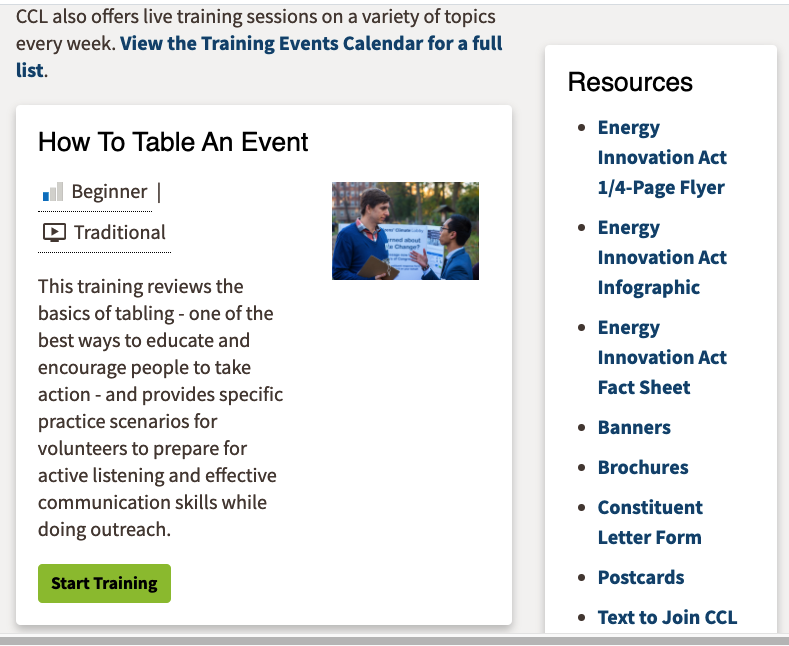
Click the Start Training” link under the training description to open the the training page. You will find a description of the training subject and tabs to access text, video, and audio training materials, as well as additional resources.
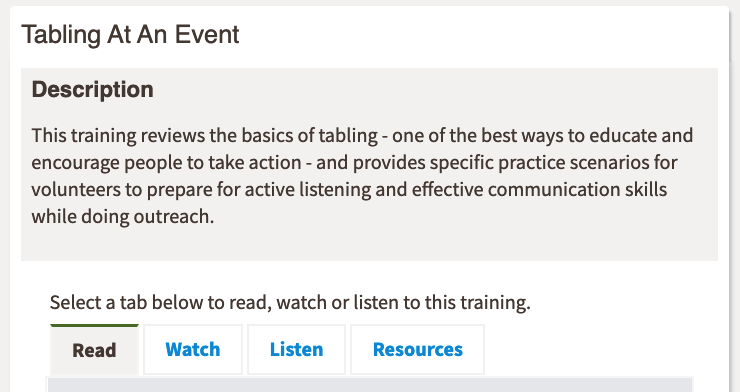
The training materials offer step-by-step instructions as well as an introduction to the subject, tips, and benefits.
Note: Not all training subjects have training materials in every mode (text, video, or audio).
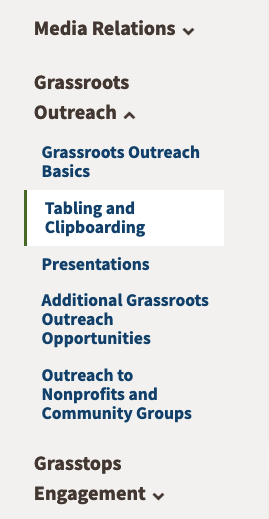
On the left side of the topic page (such as "Tabling and Clipboarding"), you can explore related topics with a menu for that topic category, such as this one for “Grassroots Outreach.”
Tracking Your Trainings
You can now log trainings you have completed using a convenient button that links directly to the Action Tracker. Logging your trainings will help you keep track of your personal development, as well as helping your group leader understand your interests and progress.
To log a completed training, scroll to the bottom of any training page to find a green button labeled “Log your training.” 
Clicking that button will take you to the Action Tracker and display an Edit Your Action page.
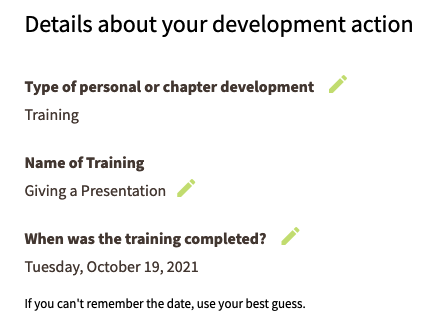
It will indicate that you are logging a training as a personal development action. The name of the training is displayed (check to be sure it’s the one you completed) and the current date. If you completed the training at an earlier date, you can change the date by clicking on the date or the pencil icon. Click again in the date field to get a popup calendar and navigate to the date you want to enter. If you don’t remember the exact date, just enter an estimate.
Another way to log a completed training is to go to the Action Tracker, click on “Log an Action” on the left side and then select the "Chapter and Volunteer Development" category. Scroll down and click “Next” to see more choices. Choose "Trainings" and select a training from a dropdown menu along with the date (estimated) you took it.
The number of trainings you log will be displayed in the badges in your Member Profile.
We suggest you visit all the trainings you have completed prior to October, 2021 and log them. This will help your group leader understand your interests and will also help the Education Team track which trainings are the most useful.
Note: Training opportunities that are offered by local chapters, Action Teams or other organizations should be logged within the "Chapter and Volunteer Development" category, but then by selecting the "Other" option.
Finding CCL Digital and Printable Resources
To access the CCL Resources page, first click on the “Resources and Training” in the top menu of any page. Then select the “All Resources ” link in the the dropdown menu.

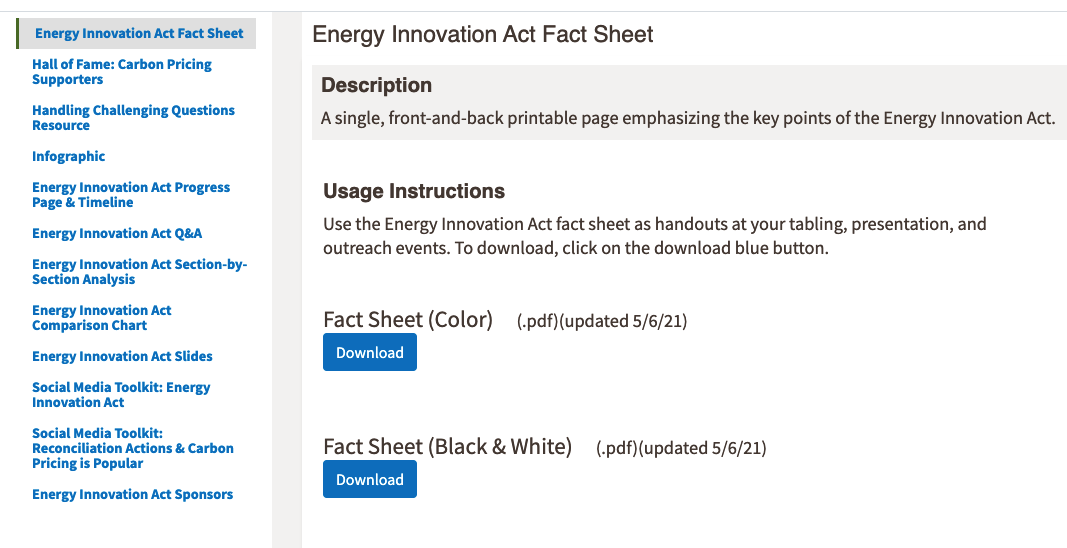
At the top of the resources page are featured resources, which spotlight the newest, most important, or most popular items. Below the featured resources are all the other resources, grouped by categories. Select any of the categories to view a list of associated resources, such as resources related to the Energy Innovation Act shown below. Click on any of the items to go to a page with information and download links for that resource.

On each individual resource page, such as the Energy Innovation Act fact sheet shown below, you’ll see a brief description of the resource at the top. Next there are usage instructions as well links to download the resource. Often there are choices to download various versions of the item such as color, black and white, or Spanish. At the bottom are links to related training topic page(s) if you are interested in finding out more about the context for this resource or detailed advice on where and how to use it. On the left side is a menu of all the other resources in the same category.
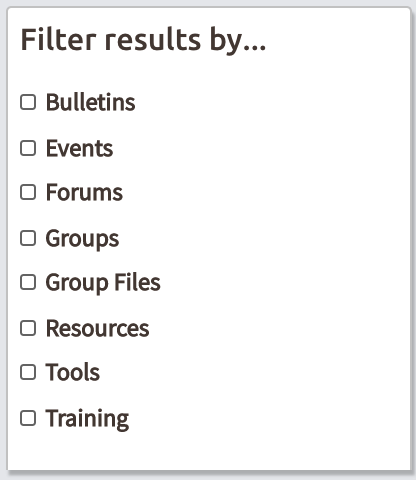
Tip: if you are uncertain what category a resource you are looking for may be in, use the main site search and filter your results by selecting the type of item in the checkbox on the left side.
Learning About CCL Tools
Examples are field reports, meeting plan templates, CCL Chapter Rosters, and a personal carbon dividend calculator.
To access the CCL Community Tools page, click on the “Tools” top menu button. Then select the “All Tools" link in the the dropdown menu.

At the top of the tools page are featured tools. Below that all the CCL tools are listed and divided into categories such as “Lobbying Tools.”

Each tool is linked to an informational or instructional page on CCL Community.
CCL Community Forums
There are both Sitewide Forums and group forums. To access the Sitewide Forums go to "Connect" in the top menu of any page and select Sitewide Forums.  Sitewide Forums are organized in broad areas such as "General Discussion" or "Lobbying Congress." Members post questions or useful information. On the Sitewide Forum page below the list of forums is a box displaying recent activity (topics and posts) from all the forums. On the right side is a “Search Forums” field, guidelines, and forum help.
For your CCL chapter and action team forums, go to their home page and click on “Forums” in the left-side menu.
Whether in the Sitewide Forums or your group's forums, once you've selected a forum category you will see various topics that members have posted about. You can view topics by selecting the topic text from the post, or post your own topics by selecting the "Start a New Topic" button on the bottom of the page.
Once you've clicked on a topic you can see the full post, along with any replies that other members of the CCL Community have posted.
If you find a particular topic, or even an individual post particularly useful, you can bookmark the topic or post so that you can get to it later. You can also subscribe to a forum category to be notified about future posts and discussions. Follow the instructions below to set up subscriptions. In this way, forums function like Google Groups.
Forum Topics, Categories, and Replies
- Topics - A topic is a post within a forum. You can subscribe to updates and replies to a specific topic. You can also bookmark a topic in order to navigate to it from your Dashboard.
- Categories - A forum category is a group of topics within the forum. In a broad forum it may be useful to group similar topics - for example, the category “Working With Editorial Boards” in the Media Relations Sitewide Forum. You can bookmark categories to get to them from your Dashboard.
- Replies - Members can reply to topic posts in order to contribute to the discussion.
Post a Topic To A Sitewide Forum
See the FAQs in the Communications category for instructions on attaching documents to a post, embedding photos in a post, as well as tips on the best way to paste text into a post.
Post a Topic to A Group Forum
See the FAQs in the Communications category for instructions on attaching documents to a post, embedding photos in a post, as well as tips on the best way to paste text into a post.
Note: The default notification setting for all members of a group is to be notified of new forum posts from the general discussion forum, but not from any additional forum categories you customize and add. Therefore if you want to post an important update in the forums that all group members see, start a new topic on your group's general discussion forum.
Reply to a Forum Topic or to Another Reply
This opens a text box. Add your reply. You can also add documents by dragging a file into the text box. Click “Post” at the bottom of the reply window This will add your reply to other replies (if there are any), sorted by oldest on top.
If, however, you want to reply directly to someone else’s reply, click on the “Reply” link at the bottom of their reply.
When replying to a topic post or a topic reply it may be helpful to quote the original text, or the part that your reply is referring to. To quote a topic or reply, click on the "Quote" link at bottom of post.
When you do this the full text of either the post or reply will be pulled into a reply text box. If desired, you can remove parts of the quoted text in order to get the portion you are interested in quoting.
Adding Photos to Forum Posts or Replies
When composing the message, first add text. Place the cursor where you want the photo to appear. Then click on the image icon in the editing toolbar (see below).

This will bring up a dialog box that displays all photos that you have previously uploaded to CCLCommunity, as well as a box to browse to other photos on your computer. Select a photo from your photo gallery or select “choose file” to upload a new photo, which can be any of these file types: BMP, GIF, JPEG, JPG, or PNG. If you are uploading a new photo, add a name (required). Then click “Post” at the bottom of the dialog box. This will add the photo to your gallery and also to your forum post or reply.
The photo will appear in the post text where you have positioned it. Depending on the size of the original photo, you may want to resize it. Right-click on the image to see a pop-up menu. Select “image properties.”
In the “Image Info” default tab you can set the width and height of the photo, as well as add a border or specify horizontal or vertical space around the image. Just enter numbers - they represent pixel dimensions. The preview pane will display the image with text to give you an idea of what it will look like and help size the image. You can also choose left side or right side alignment.
In the “Link” tab you can enter a URL if you want to image to link to a web page or an item in CCL Community.
For instructions on adding photos to CCL Community messages, see this FAQ.
Liking a Topic or Reply
There are also additional reactions available for members to use. Mouseover the "Like" icon to choose one of these options: Love, Clap, Celebrate, Insightful, or Interesting.
Searching the Sitewide Forums

After entering search terms and clicking on the search icon, you will be taken to the Forum Search Results page, where the results of your search are displayed. On the left side of the page you can refine the search results with filters.
“By Category” lists all the Sitewide Forums and associated categories. By default all forums and categories are included (colored blue). If you want to focus your search by excluding forums or categories, click on them to make inactive (gray color). The search results will update instantly.
Use the “Time Frame” filter at bottom of left side to narrow the range of dates of postings included in the search results.
At the top you can order the resulting list of topics and posts by “Most Recent,” “Top Rated,” “Most Commented,” or “Relevance.
If desired, you can change the search terms and search again at the top of the page.
Managing Sitewide Forum Subscription & Notification Preference
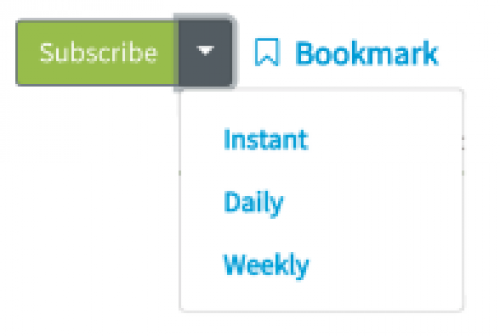
Subscription options are:
- Instant: sends an email each time there is new content. This is the only option that allows the reply by email feature (see this FAQ).
- Daily (recommended): aggregates all content in one daily email
- Weekly: aggregates all content in one weekly email
If you are already subscribed, the button will display “Unsubscribe.” Select it to unsubscribe or select the dropdown arrow to modify frequency of notification.
To manage subscription and notification preferences for all Sitewide Forums in one place, click the button with your name on the top right side of any page and select “Account Settings.” Then, click the “Subscription” tab.
To change whether or how often you are notified by email about postings, review the list of Forums at top of the “Subscription” tab. The default setting is “none.”
Click “Save” at bottom of page when finished.
Note: If you subscribe to a Sitewide Forum, such as "Media Relations" that has categories (such as "LTEs and Op-Eds"), you will also be subscribed to all the categories. If you wish to subscribe to only one or more of the categories, unsubscribe to the parent forum and subscribe individually to desired categories.
While you can't subscribe to a topic, you can bookmark it. Also, if you post a new topic or reply to a topic you will be subscribed to that thread for instant updates if anyone else that responds to that topic. However, if you are already subscribed to the parent category of that forum, this topic inherits the frequency settings you've chosen for all topics in that forum.
Update Your Forum Email Settings
Watch this tutorial on updating your Account Settings on Community (4:27 min).
Reply to Forum Updates by Email
However, in the cases listed below a "Reply By Email" post will be filtered out and not posted to the forums.
- If you reply within 15 seconds of it hitting your inbox (auto-replies are filtered out).
- If you reply from a different address or with a different subject line than the Forum post notification (i.e. no email forwarding - then replying).
- If you reply more than once. After you've replied (or even attempted to reply) all other replies will be filtered out.
Action Teams, CCL Chapter Teams, and Custom Groups
Action Teams: Unlike CCL Chapters, Action Teams are organized around specific topics or areas of focus. Most teams meet regularly by group calls and communicate within their team's group page on CCL Community. To find out about CCL's 50+ Action Teams visit the Action Team Directory.
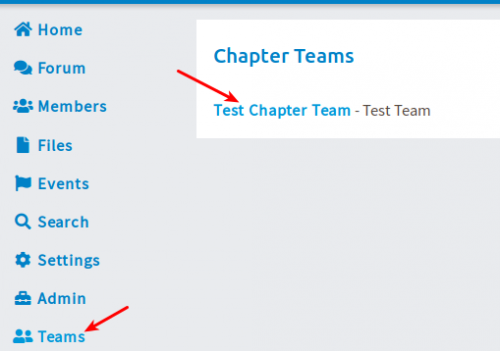
CCL Chapter Teams: CCL Chapter Leaders can create group pages for local teams to collaborate on a particular area (such as an outreach team or a media team). If you would like your CCL chapter to support a CCL Chapter Team, contact your CCL Chapter Leader.
Custom Groups: CCL Community allows State and Regional Coordinators to create group pages for Custom Groups of CCL members to collaborate (such as a CA Liaison Group or a DFW Media Group). If you have an idea for a Custom Group and are not a State or Regional Coordinator, you can find your coordinator in the Regional Coordinators directory and request they consider creating a Custom Group for your state or region.
Joining Action Teams
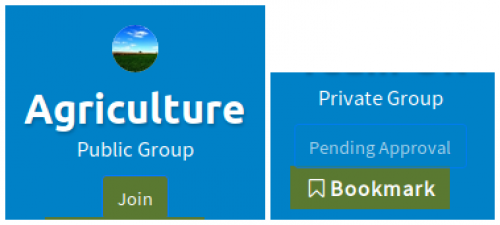
To leave an Action Team group, click on “Settings” on the left side of the team home page, and then select “Leave Group” at the top.
Leaving a Group
A green "Leave Group" button will appear beneath the Group name at the top of the screen. Click that button in order to leave the group.
Note: This applies to Action Teams, Custom Groups, and role-based groups (i.e. Group Leaders, Liaisons, etc.) If you need to change your CCL chapter, go to Changing Your CCL Chapter Membership.
Upload Documents and Photos to Your Group or CCL Chapter
Note: Group Admins can remove any or all of these links. If you don’t see the media type you want to upload, contact your Group Admin to determine why it was disabled.
Clicking on either the file or photo links will take you to a page where previously uploaded documents or photos (if any) are displayed. There will also be a dialogue box to upload. If uploading a file such as a word processing document or spreadsheet, either drag and drop your files or select the "click to upload” link. If uploading a photo, click the "Add Photos" button in the middle of the page. You can also create folders of files and photos, if desired.
To upload (embed) a video to a group, see the FAQ on videos below.
The Files / Photos / Video pages allows CCL chapter members to view files you and other CCL chapter members have uploaded onto your group page. There is also an optional checkbox to allow your file to be shared sitewide, if desired. If you choose to check the "Share Sitewide" checkbox when uploading, your documents, photos, and videos will be marked as public and will be available for any CCL Community member outside of your group to find when searching on the main CCL Community search page. By not checking the "Share Sitewide" checkbox you will restrict access to your file/photo/video and it will be available only through your group's page.
You can also upload personal files to your My Files page. While none of the files uploaded here will be visible from a group page, you can follow the same "Share Sitewide" checkbox to set the desired level of privacy as described above. The link to your My Files page is also located on your profile page. On the lower left side, you’ll see the “My Files” block. Click on “Manage My Files.”
Uploading (Embedding) Videos to Group and CCL Chapter Pages
When you click on an embedded video thumbnail, it launches a player on that page and links the player to the video on its hosting service.
To embed a video, first launch the video from the hosting service site in a web browser. Then, copy the URL from the address bar (the text field at the top of the browser).
On a CCL chapter or group page, click “Videos” on the left hand side. This will open the video gallery page for that group. Select the blue bar: “Add Videos.” This then opens a dialogue box with instructions and a text field. Paste the URL into the text field. Next, click the blue “Embed” button. This establishes the link to the video on the hosting service. Now you will see a title field (required) and options for a description, tags, and a checkbox to “share sitewide.”
Both title and description will help members find the video in search. Choose “share sitewide” if you want to video to be public and available to members outside of the group.
Click “Post” when completed. A video thumbnail and the title will appear in the Video Gallery. Members can click on the thumbnail or title to view the video in a player on that page.
Note: If you wish to embed a video you have personally created, you need to create an account on a compatible hosting service such as YouTube, upload it, and then proceed as described above.
For your My Videos page, follow the instructions outlined above.
Managing Group Subscription and Notification Preferences
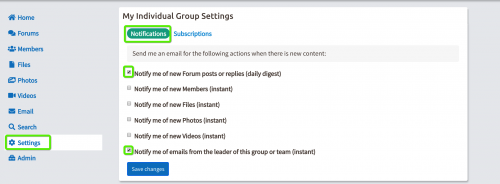
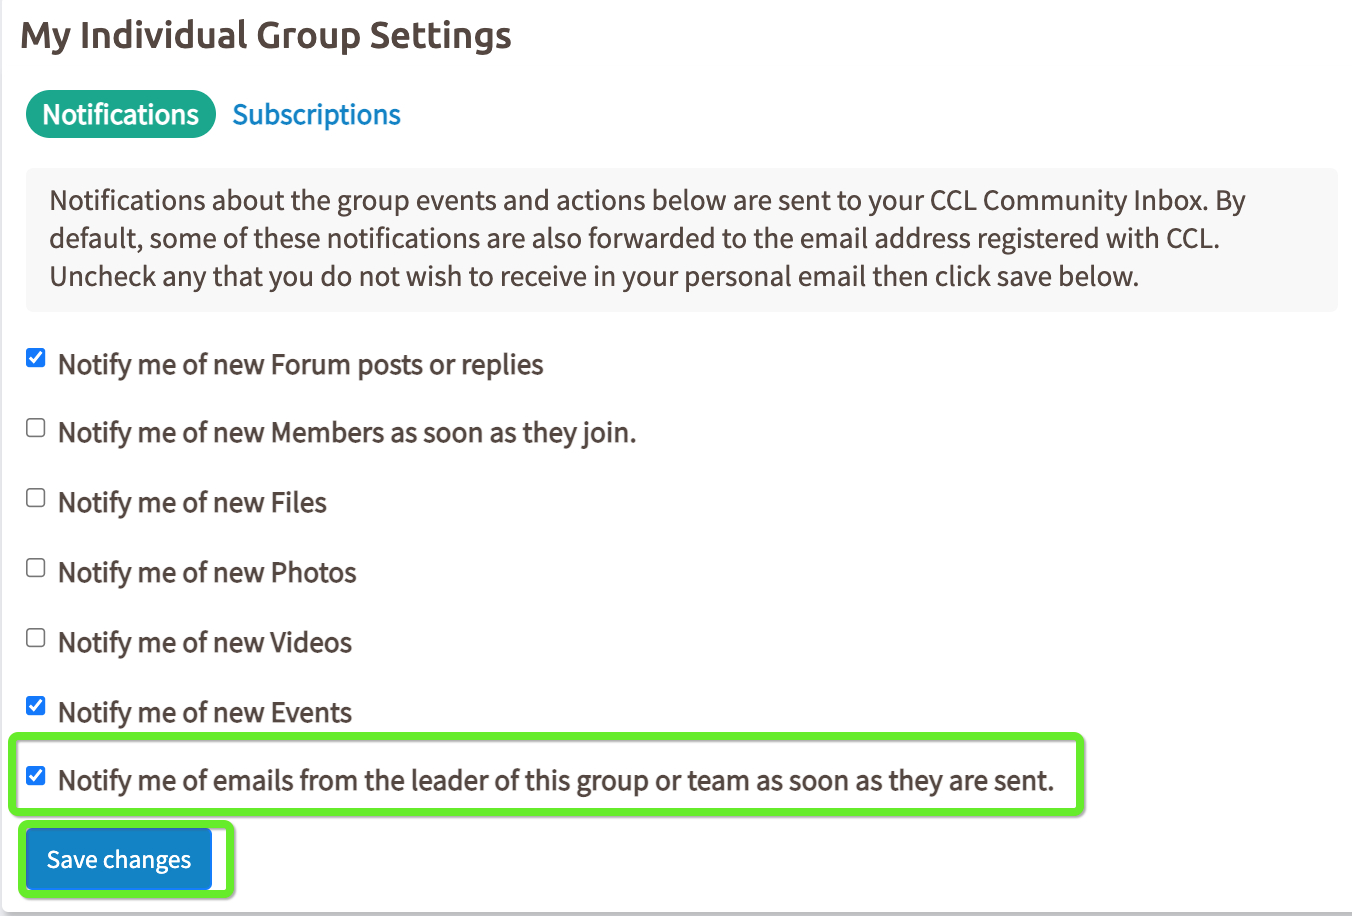
By default, you will be notified about two things from group(s) you belong to: new group forum posts (in a daily digest) and email messages sent by your group's leaders.
You can set the types of group notifications and subscriptions that you want to be notified about by clicking on "Settings" in your group's home page left side menu. The default view will show the “Notifications” tab and below that you'll be able to toggle the various notifications on and off. To adjust the settings for forums in your group, click on the "Subscriptions" tab in “Settings” and select the level of frequency you prefer.
Note: To manage subscription and notification preferences for all groups you are a member of, as well as group forums, click the button with your name on the top right side of any page and select “Account Settings.” Then, click the “Subscription” tab.
Scroll down to see a listing of the Action Teams and other groups you have joined or belong to. To manage subscriptions and notifications for a group, click on the group name. This will take you to the group home page and the “My Individual Group Settings” box. As described above, select the “Notifications” tab to determine what types of events you want to be alerted to. Select the ‘Subscriptions” tab to set the frequency of notifications for the group and group forums, if any.


 your top menu links disappear? And all you see is empty space except for the CCL logo on the left and a blue square on the right?
